Setting up Runtime Workbench
We come to the final step of our setup. You will need to setup your run-time workbench for testing. Typically, for most eclipse installations this shouldnt be a problem. Just start your Run-time Workbench (from the drop down list of the Run button).
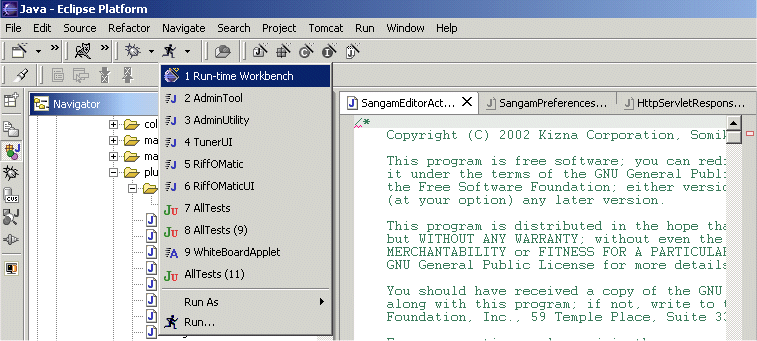
But in case you face issues, try opening the Run configuration (look at the menu in the above pic, last option). In the Run Config, choose the Run-time workbench, and go to the Plug-in and Fragments tab.
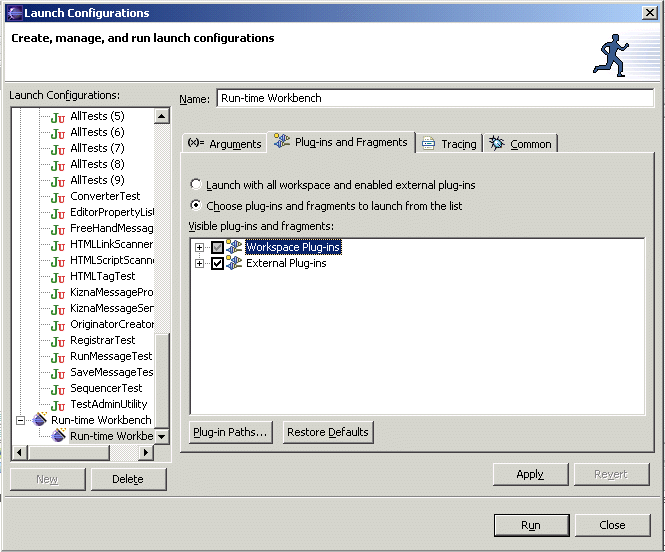
Make sure that there are no conflicts, and that in the Workspace plug-ins, you only have the Sangam plugin. Having all the other external plugins checked should work. If you still face problems, open a support ticket describing your problem.
Assuming you've come this far and that you already know how to check out a project from CVS, we can proceed to the next step. We will be testing a dummy programming project on the workbench. For your convenience, we have kept a project titled "Dummy" in the Sangam repository. Create a new repository location - in the same manner as you did for getting the plugin project, except, when you checkout, choose Java Project instead of Plugin Project. In the source tab, make sure that "Use spource folders contained in the project" is checked. Then click Add Folder, and add the folder "src". You will be prompted if you wish to use the folder "bin" for the classes - accept it. When you click Finish, the Dummy project should be in your Eclipse Workbench. Two machines can be setup - and before pairing both should do a "Replace with -> Latest from Repository" on the src directory, to synchronize the projects.
Thats it! You're all set to develop Sangam! If you are new to Team Programming
with Eclipse using CVS, please go through this document.